![OGT logo-2.png]](https://support.offgridtrailers.com/hs-fs/hubfs/OGT%20logo-2.png?width=150&height=150&name=OGT%20logo-2.png)
Supplies required:
- Drill
- C clamps (to clamp plywood guide to roof rack.)
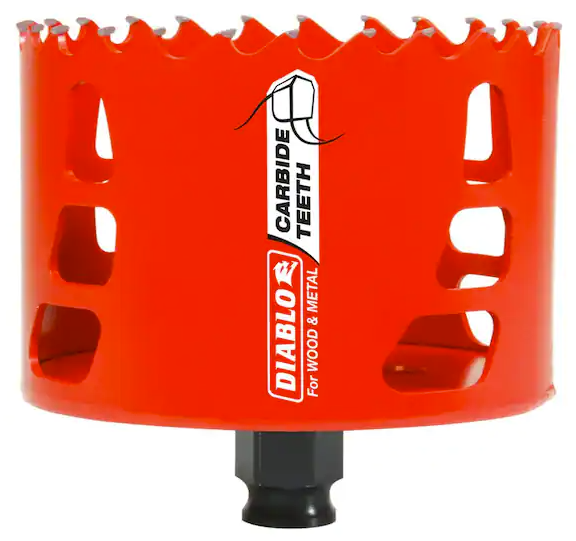
- Hole saw - 4.25" Diameter
- Automotive black rtv sealant
- Piece of plywood, 1/2" or 5/8" - to use as a guide. This will need to be clamped to the side of the trailer firmly - this can be to the roof rack. To get there, 24" x 12" should be ok.
Pando
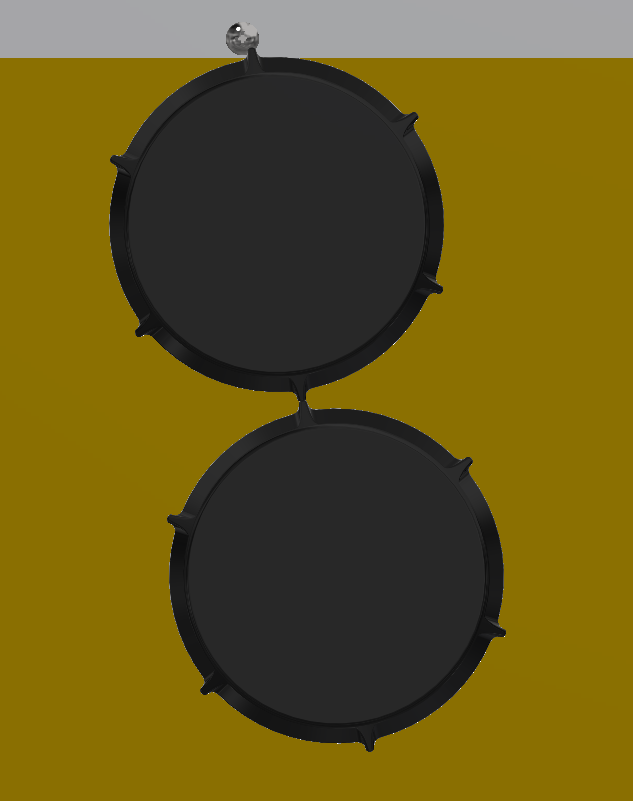
See above - the port covers will just clear each other. Normally, two of the grips will not be aligned. The dimensions allow for the maximum clearance from the two holes - on new trailers that come with 4" ports, the holes are in different positions - but here we need to drill over top of/cover the existing 3" holes. It's a good idea to mock up the ports now, checking with the caps upside down against the metal surface to make sure the marked locations will work.
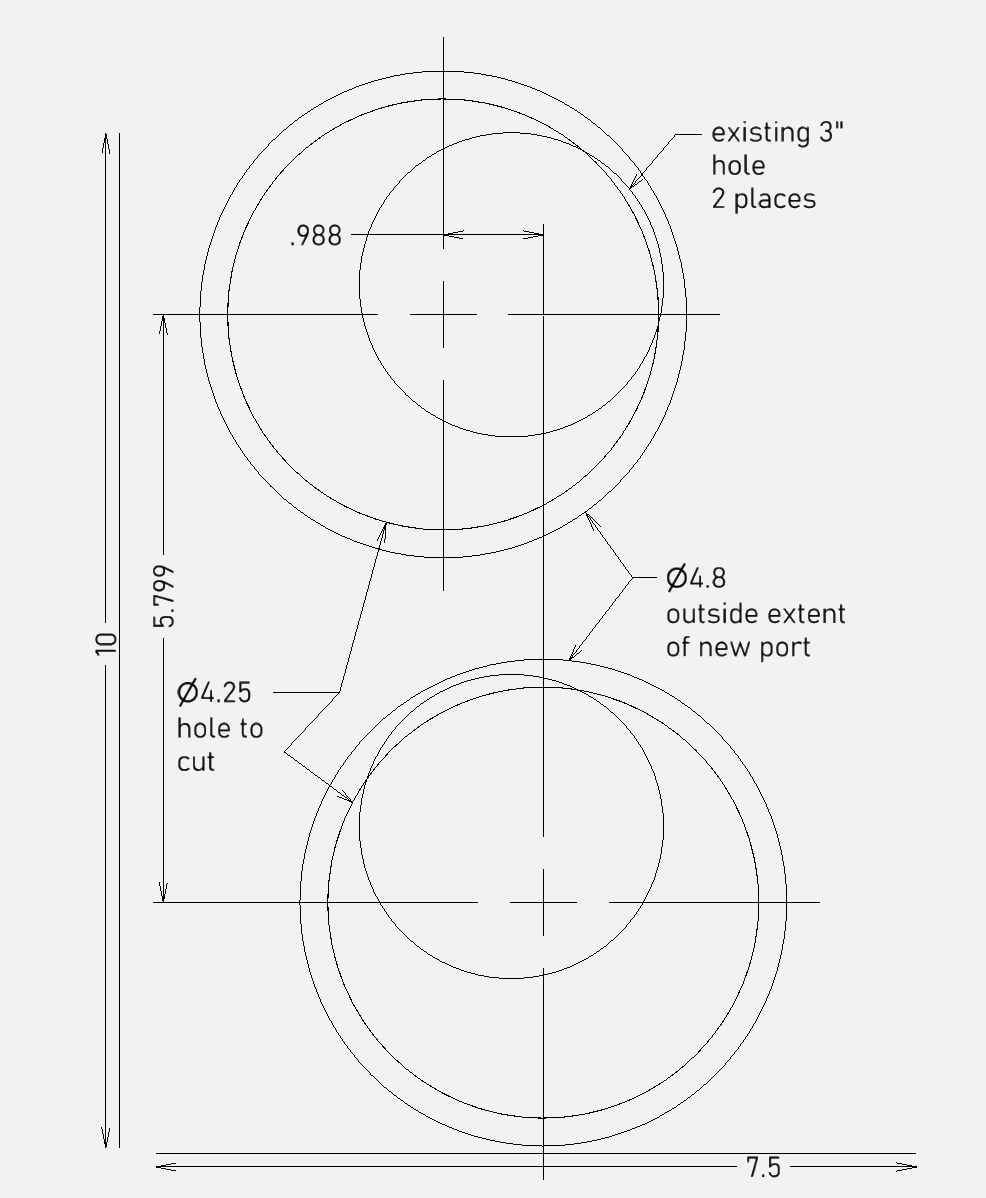
We cannot use a pilot on the hole saw, as there is no material into which it can cut. The image above can be printed full size on to a 8 1/2" x 11" piece of paper, and then that can be transferred on to the plywood. Note the 7.5" and 10" dimensions, these can be used to adjust scale - ensure that they are correct on the printed copy.
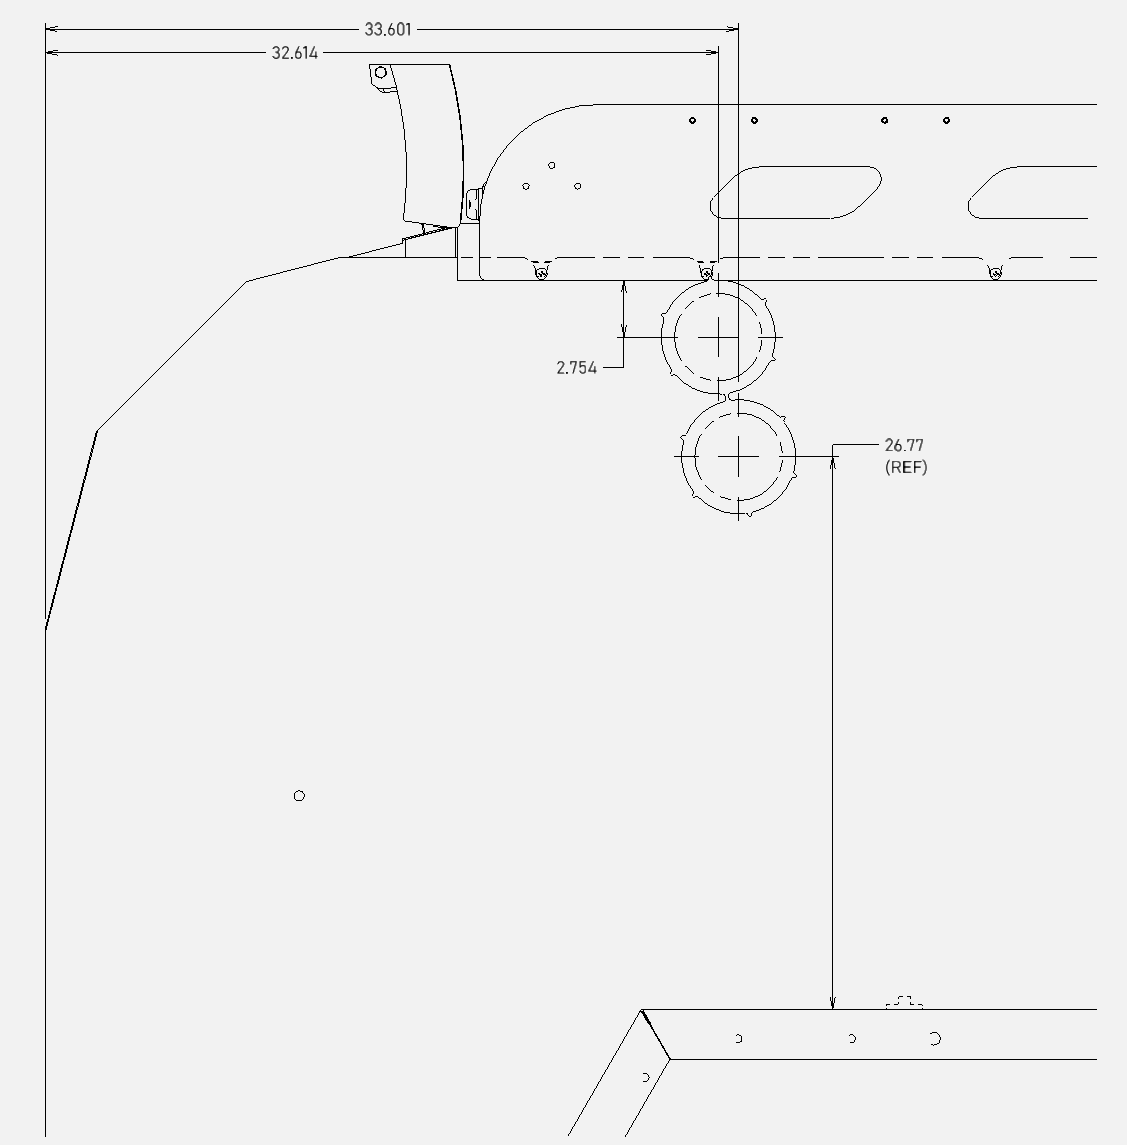
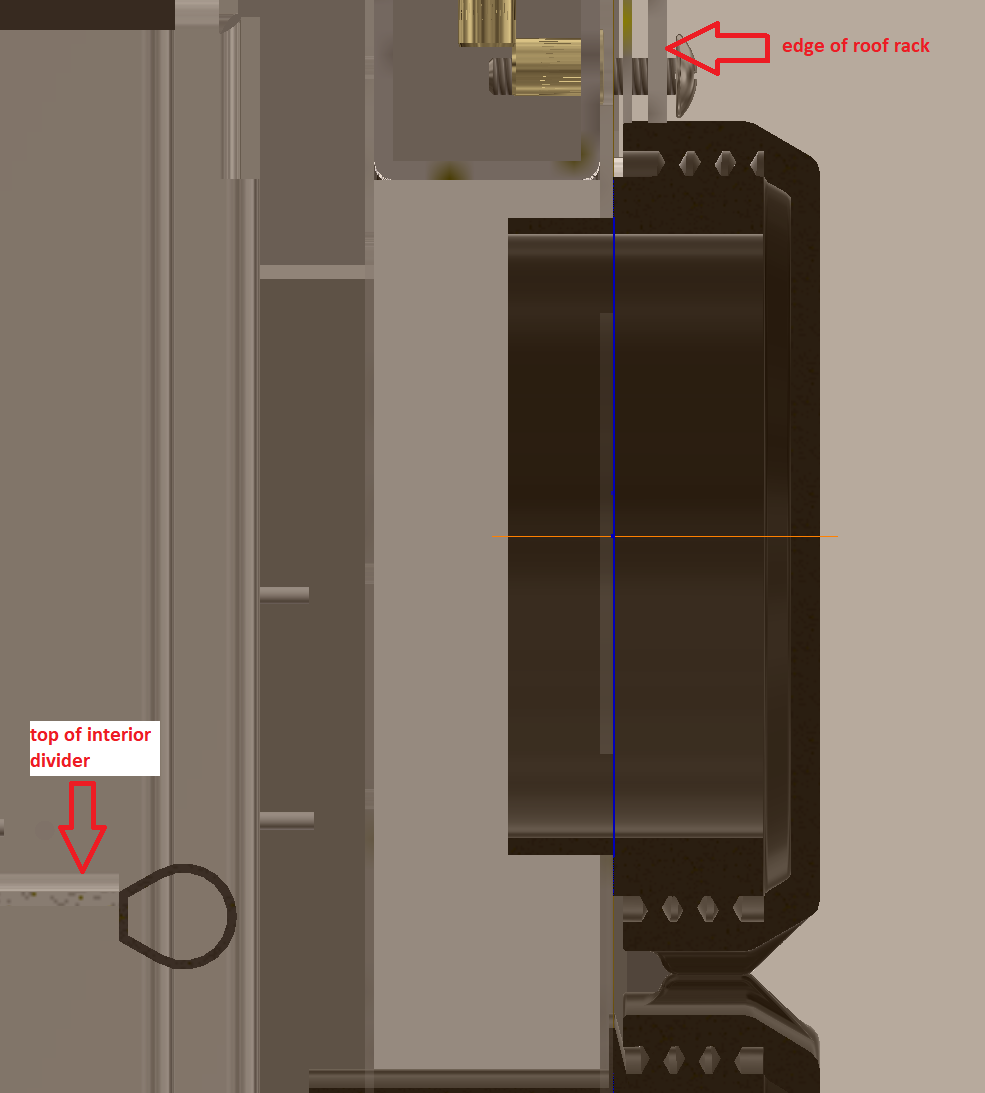
Here above are the approximate hole center distances from nearby objects. You are wanting to trial fit the upper port so that the edge of it/the threaded portion/the cap are as high as possible but do not interfere with the side rail of the roof rack. The 33.601" and 33.614" dimensions are to the aluminum tube at the back of the trailer, with the kitchen door open. Once you remove the existing ports and position the template, you'll be able to look inside and see where the new 4" ID ports will be located. You need to make sure that the 4 1/4" hole saw will not start to substantially encroach on any of the interior cabinet panels.
Once the holes are drilled, the new ports can be installed, with a small bead of automotive black rtv sealant - preferred because of temp/weather resistance and material compatibility. This will also facilitate removal if required.
Expedition
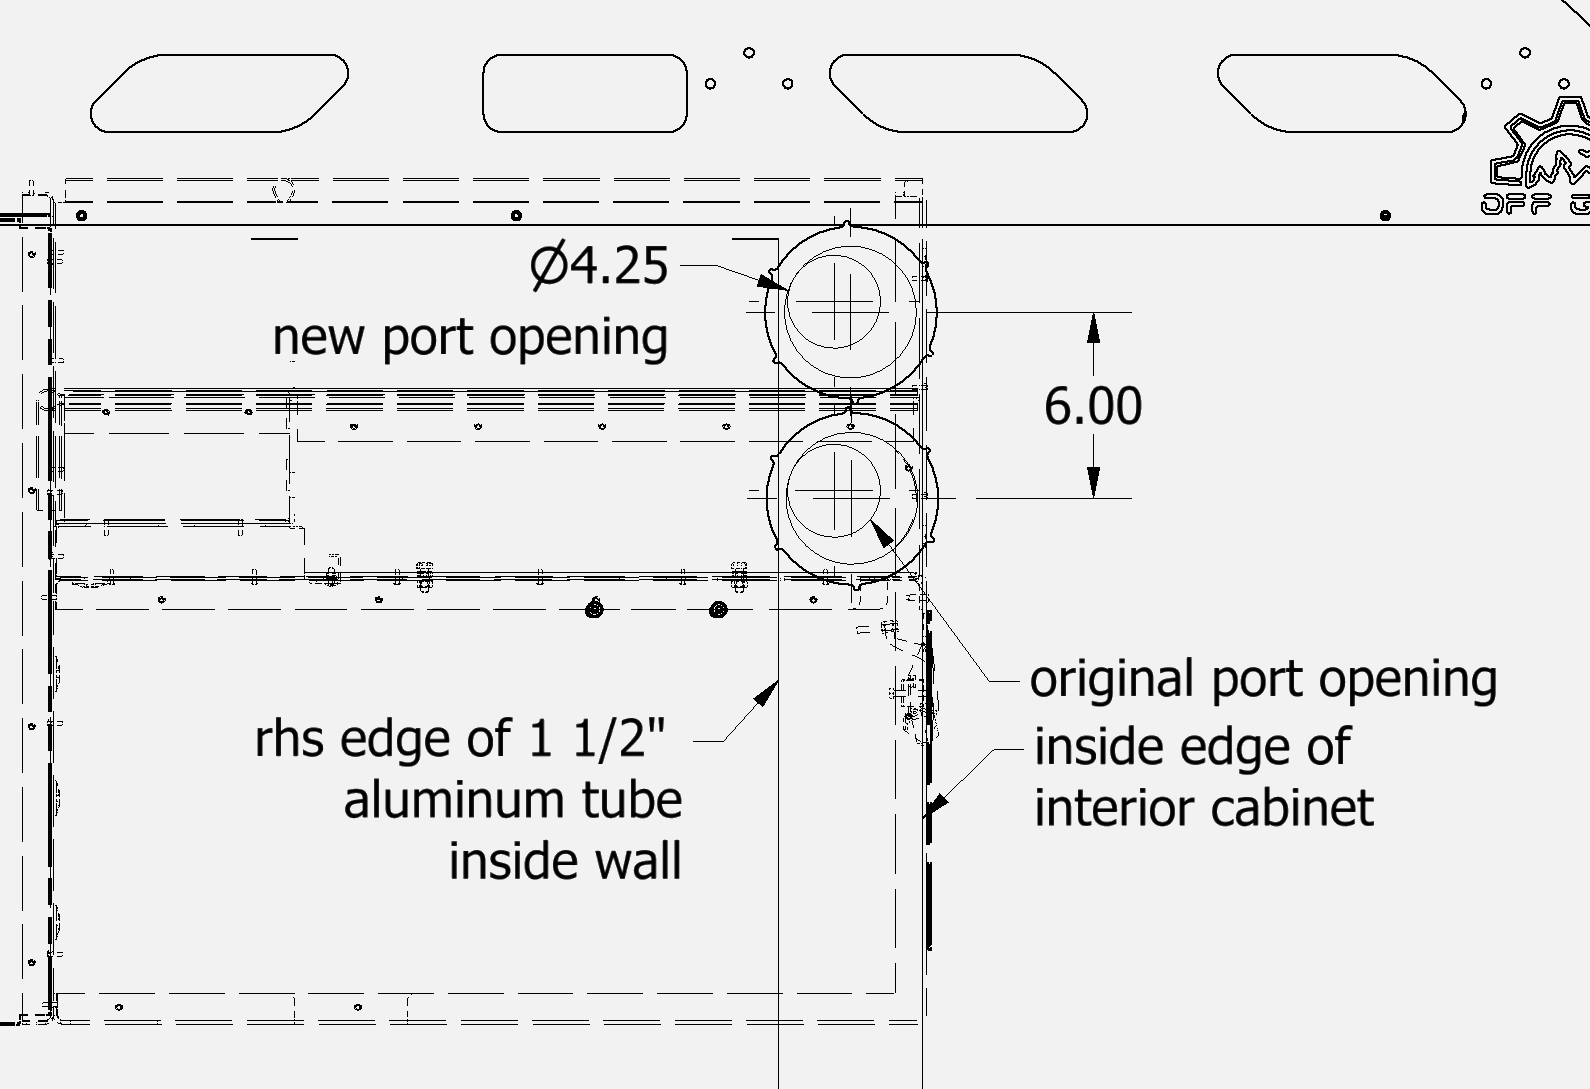
See above - as with the Pando, the cap clearances are very tight as the new holes must capture the old, and the openings must clear the inner cabinet walls and the edge of a vertical aluminum wall member.
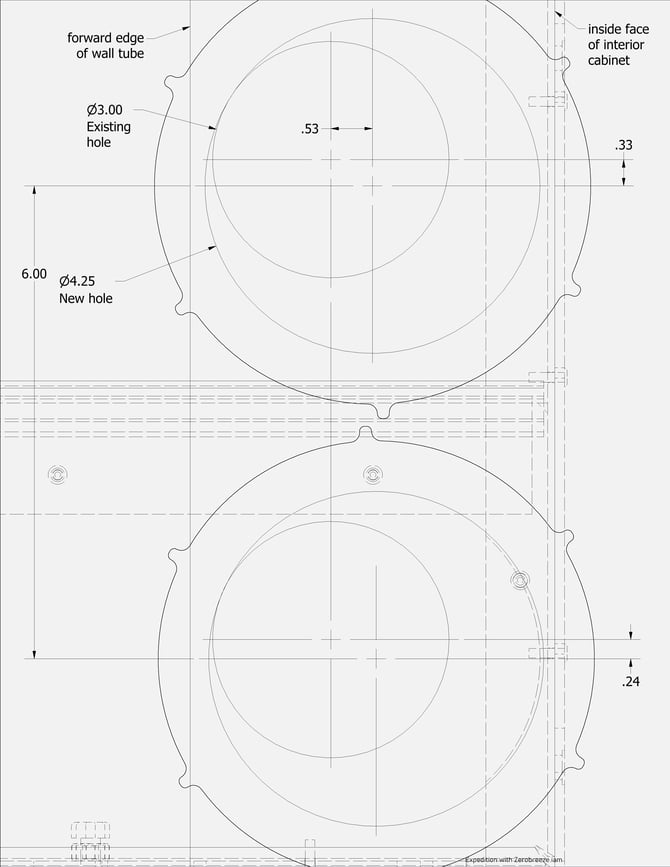
We cannot use a pilot on the hole saw, as there is no material into which it can cut. The image above can be printed full size on to a 8 1/2" x 11" piece of paper, and then that can be transferred on to the plywood. Note the 6" dimension, it can be used to adjust scale - ensure that it is correct on the printed copy.
Once you remove the existing ports and position the template, you'll be able to look inside and see where the new 4" ID ports will be located. You need to make sure that the 4 1/4" hole saw will not start to substantially encroach on any of the interior cabinet panels.
If you have questions, please email warranty@offgridtrailers.com!