![OGT logo-2.png]](https://support.offgridtrailers.com/hs-fs/hubfs/OGT%20logo-2.png?width=150&height=150&name=OGT%20logo-2.png)
WARNING: All mechanical, electrical and propane gas system repair work on these trailers must be undertaken by qualified service personnel. Prior to beginning service, review the entirety of this document and contact warranty@offgridtrailers.com if there are any clarifications required.
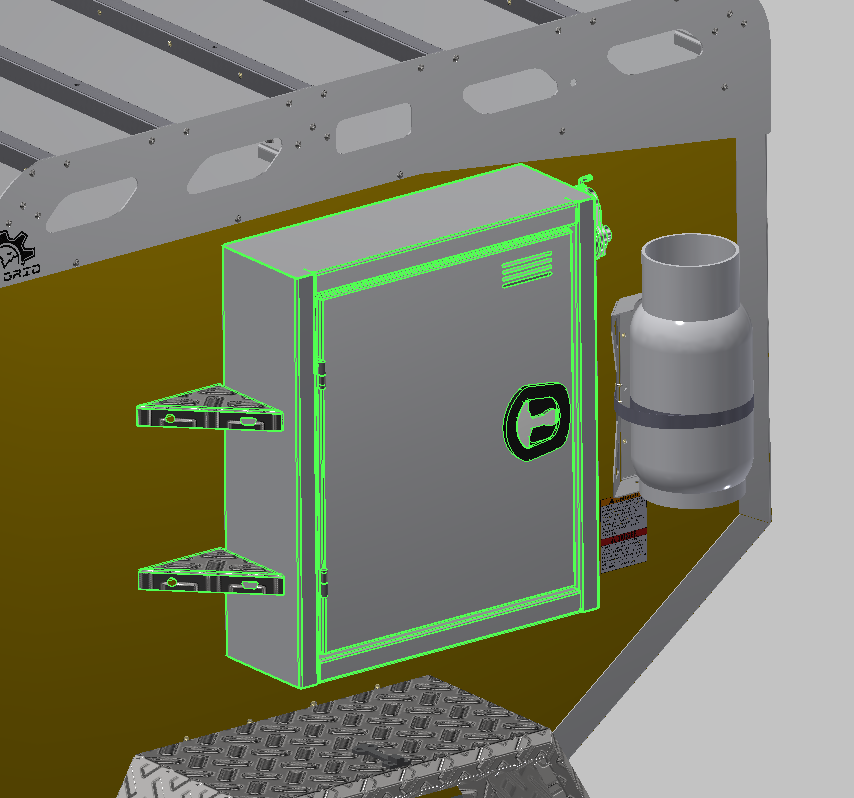
The Propex furnace on the 2.0 models is installed vertically in the cabinet on the LHS of the trailer unit. It is fed by a Fairview GR-9950 two stage propane gas regulator, set at 13.5" of water column.
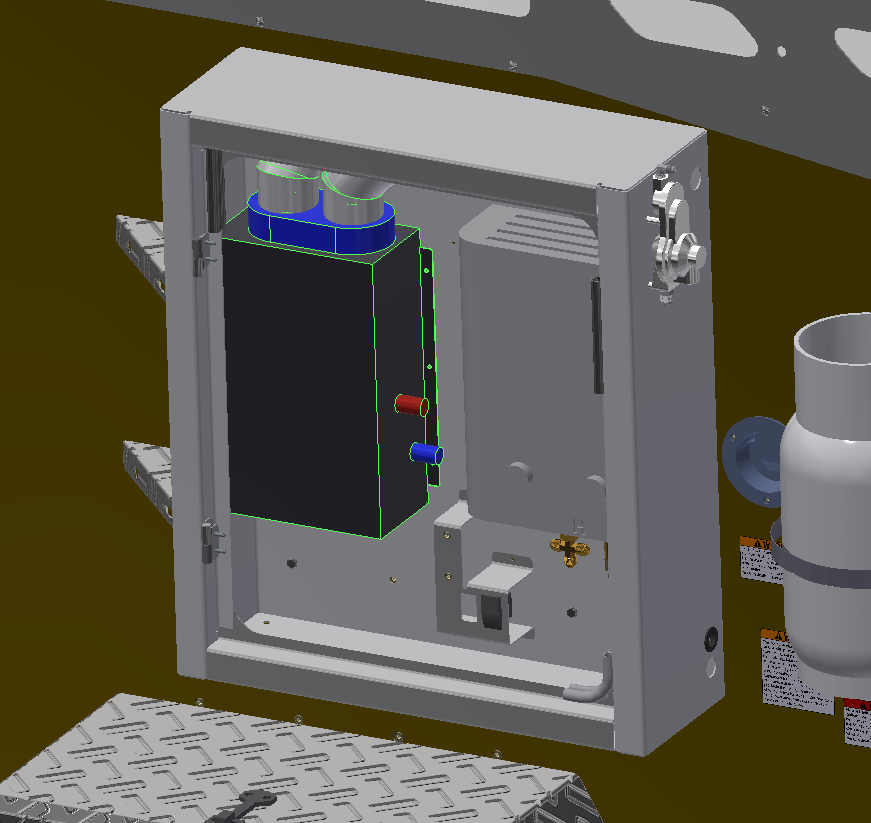
The furnace location is shown above with the door hidden for clarity. The blue and red "pegs" on the RHS or trailer rear of this representation are the fresh air intake and combustion air exhaust. The ducts in grey at the top are the supply and return to the cabin interior. These must of course be disconnected in order to remove the furnace unit.
On the bottom of the unit is the gas supply fitting, SAE 45. When disconnecting or tightening, be sure to use backup wrenches to avoid torque effects on the adapter fitting or on the unit itself. On top are the electrical supply and thermostat connections.
CRITICAL: Prior to removal, disconnect all power to the Propex unit; this is best done by tripping the 12V circuit breaker in the front storage box and confirming that no power is being supplied to the furnace and its thermostat. This can be done by checking the terminals at the fuse block. ENSURE NO POWER IS APPLIED TO THE SYSTEM PRIOR TO THE THERMOSTAT BEING CONNECTED!
NOTE: Shut off the propane tank at the valve, and remove the quick disconnect at the tank to ensure no propane can leak during service. Upon servicing or replacing the unit, a leak check MUST be performed by qualified personnel on all disturbed propane system fittings.
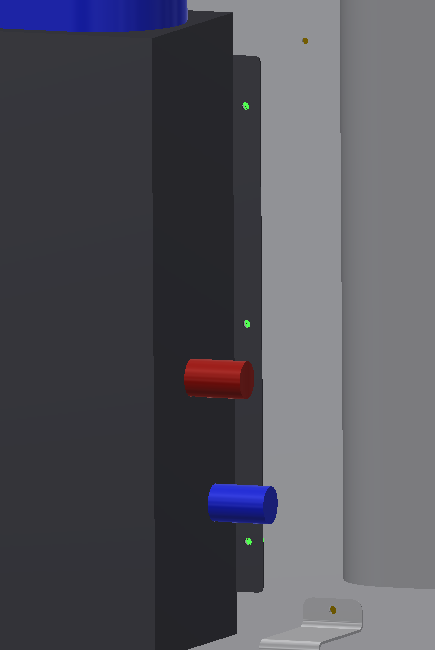
Remove the 3 fasteners on the right of the furnace housing at the locations shown in green in the image above.
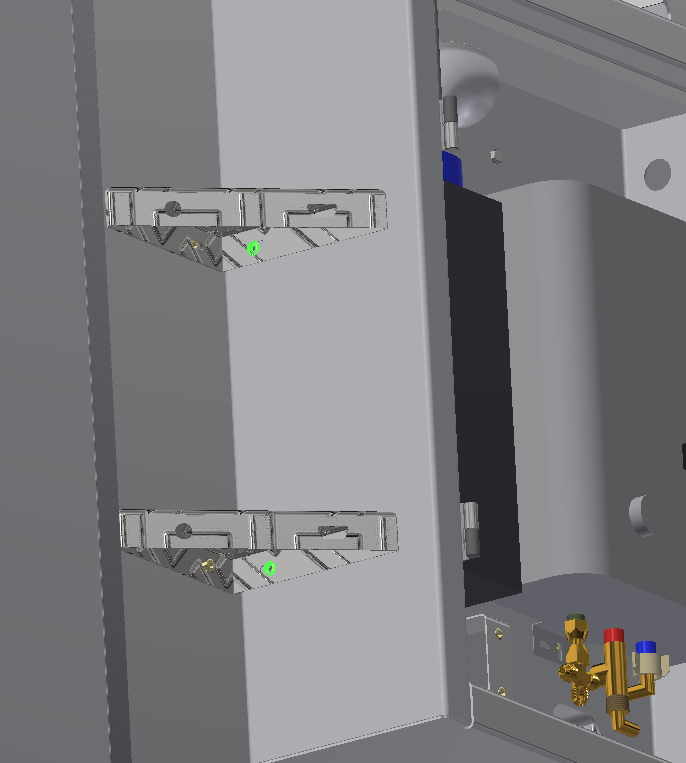
Remove the two fasteners at the location shown above on the forward side of the furnace cabinet.

This will free the bracket highlighted in green, above, which is bolted to the bolt row on the forward edge of the Propex unit. You'll need to move this proprietary bracket onto the new furnace if you are replacing it. With the bolts out, the furnace should now be free to remove from the cabinet.
Installation is the opposite of removal.
Be sure to completely connect all of the power supply wiring and the thermostat to the Furnace prior to supplying 12v to the system. Test the unit via operating the thermostat controls.
If you have questions about this process, contact warranty@offgridtrailers.com.
The Propex HS2211 manual can be found here:
https://propexheatsource.co.uk/hs2211-underloor-installation/