![OGT logo-2.png]](https://support.offgridtrailers.com/hs-fs/hubfs/OGT%20logo-2.png?width=150&height=150&name=OGT%20logo-2.png)
Safety Caution: This work instruction requires 2 adults for safety as the rear galley door struts must be removed and the door temporarily supported.

Step 1:
Get a step ladder that is high enough where you can rest the door on after you remove the rear gas struts
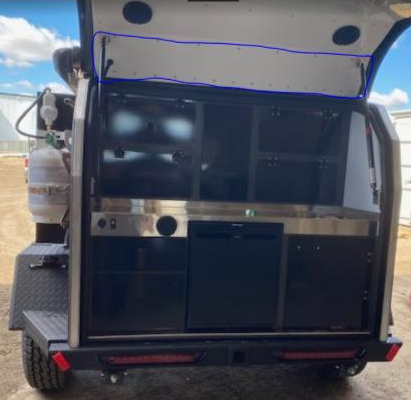
Step 2:
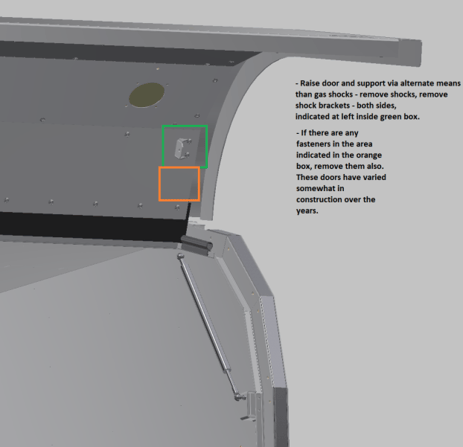
Remove all the fasteners (with #2 Phillips head tool) in the outlined blue area including gas strut brackets
Step 3:
Using a window pick or a flat plastic body panel tool pry gently on the door skin to get space between door and skin.
Step 4:
With two people, grab seal and stretch it out and slowly feed in between door and skin lining up all holes, note that you may need an aligning punch to help you align holes if the rubber gasket has deformed.
Step 5:
Replace fasteners in the reverse order including the use of blue loctite. Replace the gas shocks - DO NOT forget to include the retainer clips for safety (on the shocks)
Step 6:
After all bracket and fasteners are in place, place excess seal in the drip rail behind bulb seal in the water channel. It is recommended to use a silicone spray (see lubricants reference) to keep the drip seal from sticking to the surrounding components.
Step 7:
A garden hose (household water pressure) water test is recommended to ensure water tightness. A medium spray at a 6 foot distance for 30 seconds is sufficient.
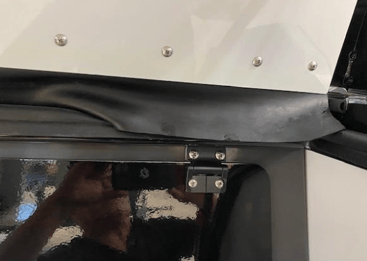
DO:
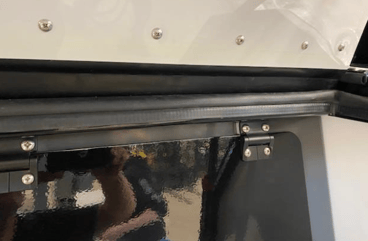
DO NOT: (do not leave the rubber seal outside the water channel as below as this will permanently deform the seal compromising its effectiveness)