![OGT logo-2.png]](https://support.offgridtrailers.com/hs-fs/hubfs/OGT%20logo-2.png?width=150&height=150&name=OGT%20logo-2.png)
How to Install the Vehicle Side of the Max Coupler
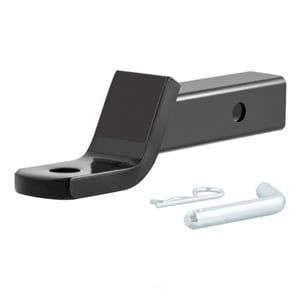
You will need a hitch insert to suit your vehicle. It is recommended to purchase an insert that will be dedicated for use with your Off Grid Trailer with the proprietary Max Coupler vehicle side mount.
The following tools are required:
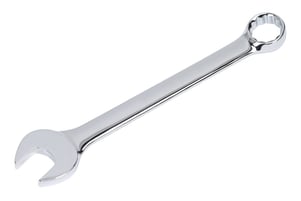
1 1/2" wrench, or a crescent style wrench with jaws that can open to 1 1/2". This is to tighten the nut on the bottom of the hitch while you hold the bolt, or to adjust the tension on the coupler through the jam nut.
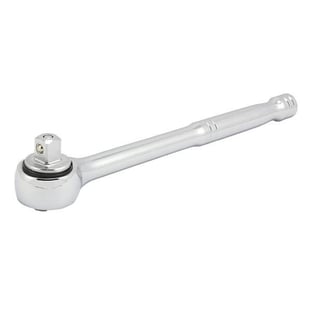
1/2" drive ratchet or breaker bar, 2' length is recommended.
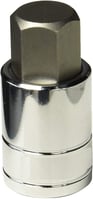
3/4" or 19mm hex socket.
To install: Make sure all play of the coupler between the bolt head and jam nut is taken up by having jam nut finger tight to the bottom of the coupler.
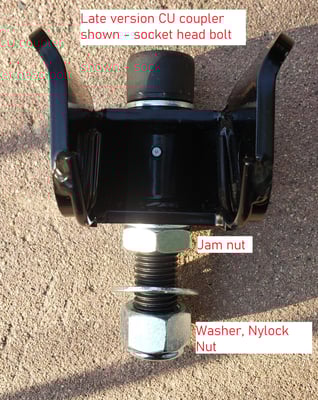
Install system onto hitch insert with the coupler ears pointing up, or the bolt pointing down.
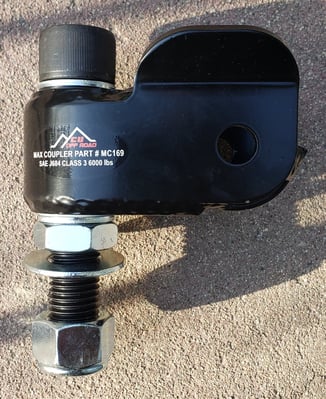
Hold the bolt head with appropriate tool and tighten bottom nut until the lock washer is flattened. Your Max Coupler may not come with a nylock nut as pictured, but rather a plain steel nut.
The coupler body should pivot on hitch insert with minimal resistance. There should be no vertical play in the coupler.
If you find resistance excessive, i.e. you cannot pivot the CU coupler by hand: loosen the bottom nut, take some tension out of the upper stack by loosening the jam nut 1/8 of a turn at a time, retorque the bottom nut, and re-check the coupler for vertical play and rotational resistance. Repeat as required.
If there is vertical play, instead tighten the jam nut 1/8 of a turn, retorque the bottom nut, then check play and resistance again. Repeat as required.
It may be helpful to do the final torque of the bottom nut with the trailer in place and a load on the hitch after mocking everything up - this will help prevent the jam nut from turning.
Re-tighten after your trip home, or 150 km/100 mi, whichever comes first.
Maintenance Tips:
- This coupler is required to be periodically lubricated with high pressure/temp all purpose grease - the manufacturer recommends the installation of "10 pumps" from a standard grease gun, before rotating the coupler several times for distribution.
- If the coupler is submerged or exposed to prolonged inclement weather, it's recommended that it be re-lubricated to push out any water.
Reference Links:
- CU Off Road Max Coupler instructions
- How to contact CU Off Road/Max Coupler directly