![OGT logo-2.png]](https://support.offgridtrailers.com/hs-fs/hubfs/OGT%20logo-2.png?width=150&height=150&name=OGT%20logo-2.png)
Customer Concern:
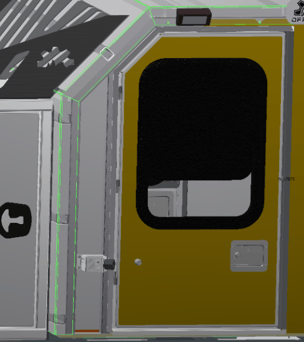
The front of the one piece roof appears to have separated from the side wall where the angle wraps the wall
What is happening? Worry Not!
The front wall is part of a one piece roof construction where the front wall fastens to the extruded aluminum tube subframe of the trailer cabin.
- The angle of front wall/roof that wraps around the body of the cabin (sides near front and side near roof line) and is fastened on the top via a proprietary hidden system and fastens to the front of the cabin via fasteners through the rear of the front storage box.
- In some rare cases overtightening of the front wall fasteners allows the side angle wrap over material of the roof/front wall to "flare" out as the overlapping angle floats the body with a SikaFlex RV (black) long life sealant.
Inspection & Repair
Step 1. Minor Repair
Items needed:
Masking tape
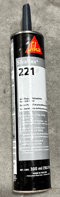
Sika Flex 221 Black
Steps:
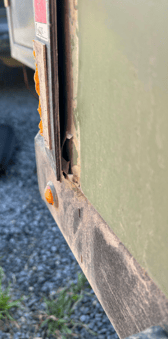
- The interface between the front wall and cabin wall wrap around is sealed at the factory with SikaFlex 221.
- Inspect the gap tolerance on LH and RH sides
- If the gap tolerance is <1/8 inch = ReSeal the interface as outline below; if the gap exceeds >1/8 inch proceed to Step 2 below.
- Remove SikaFlex 221 sealant with 95% isopropyl alcohol
- Mask the non sealed edges to ensure sealant is not overapplied to the powercoated surfaced or 3M vinyl wrap
- Reapply SikaFlex 221 sealant
- Allow 24 hour cure time before trailer use
- If the gap tolerance is <1/8 inch = ReSeal the interface as outline below; if the gap exceeds >1/8 inch proceed to Step 2 below.
Step 2. Fastener Style Repair (gap >1/8 " )
Items needed:
Sika Flex 221 Black
1/4" drill bit for truss head (part A below) OR;
3/16" drill bit (for rivets part B below)
Depending on availability of fasteners and/or skill set of RV repair service tech:
- 1/4" painted truss head screws x 10 and Tap/Die or:
- 3/16" x 3/16" stainless self sealing rivets x 10 and Rivet Tool
Masking tape (for template)
Steps:
- Refer to the image attached below to landmark and locate the areas to drill the side wall at 5 locations per side (RH and LH)
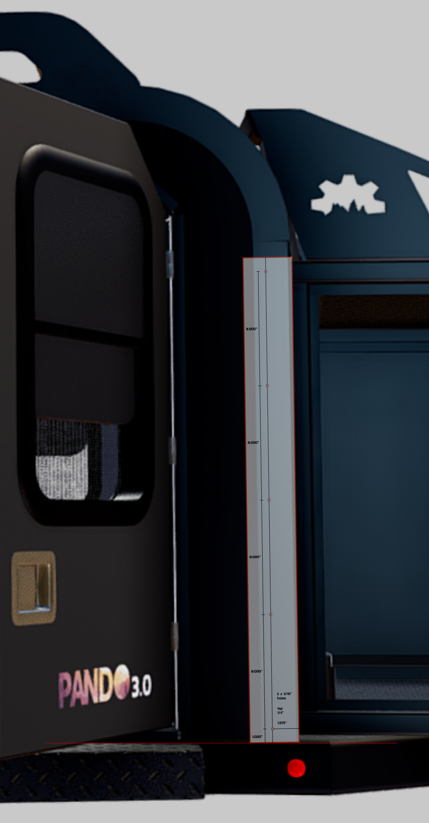
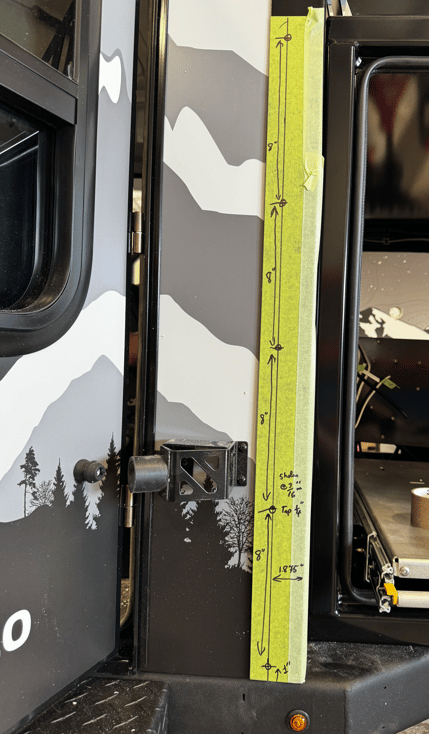
- A printable PDF template is attached for easy of landmarking
- Template PDF Instructions
- Open PDF in Adobe Reader, select Print, choose Poster setting, click print (do not print double sided)
- Trim template, using masking tape, adhere the template and use masking tape to protect the flange
- (2 person job) - ensure the roof/front wall is pulled all the way back and makes full contact with the inner cross member on the front of the wall. Failing to do so risks not securing fully to the backing extrusion tube at the cabin corner
- Depending on cosmetics and fastener availability either;
- A. Drill 3/16" at each of the 5X locations per side, tap to 1/4" and insert 1/4" painted truss head fasteners OR;
- Depending on cosmetics and fastener availability either;
- Template PDF Instructions
-
-
-
- B. if rivets are desired/available Drill 3/16" holes at 5X locations and rivet with 3/16" x 3/16" long stainless self sealing rivets
- Remove SikaFlex 221 sealant with 95% isopropyl alcohol
- Mask the non sealed edges to ensure sealant is not overapplied to the powercoated surfaced or 3M vinyl wrap
- Reapply SikaFlex 221 sealant
- Allow 24 hour cure time before trailer use
-
-
Happy Camping!