![OGT logo-2.png]](https://support.offgridtrailers.com/hs-fs/hubfs/OGT%20logo-2.png?width=150&height=150&name=OGT%20logo-2.png)
WARNING: Working on batteries can be hazardous, and safety precautions must be taken seriously. If you are not confident in performing this task safely, please seek professional installation assistance.
Have a review of the below article, the videos talk high level on how to connect batteries to the APP and also how to connect them together with the cables and plugs that came with the batteries: Advanced Lithium - New for 2023 & Retrofit option available - tips & tricks (offgridtrailers.com)
Why Upgrade to Lithium?
1. Energy Density: Lithium batteries offer higher energy density, meaning they can store more energy in a smaller and lighter package compared to AGM batteries. This is crucial for off-grid expeditions where space and weight are at a premium.
2. Longer Lifespan: Lithium batteries have a significantly longer lifespan compared to AGM batteries. While AGM batteries might last around 2-5 years, lithium batteries can last up to 10 years or more with proper care.
3. Fast Charging: Lithium batteries can be charged at a faster rate than AGM batteries, reducing downtime and allowing you to quickly recharge your power supply using solar panels or a generator.
4. Lightweight: Lithium batteries are much lighter than AGM batteries, making them ideal for off-road adventures where every pound counts.
More information available in this link: Lead Acid vs AGM vs Lithium
Considerations when upgrading:
Charging via Shore power : In order to take advantage of the fast charging, an adequate charger will be required many of the 2.0 units were delivered with a NOCO Gen10x2 charger. This charger has a lithium option, however it will supply only 10A and therefore will take up to 20hrs to fully charge a battery bank.
Some examples of chargers that can be used are:
- Progressive Dynamics Charger
- Xantrex Inverter/Charger
- Victron Charger
- GoPower Smart Battery Converter Chargers
Charging via Vehicle (7 Pin) - This will depend on if the 7-pin trailer connector is connected to the battery or not.
Disconnected: If the 7-pin AUX power port is not connected then you have two options. Either leave it disconnected and not charge from the vehicle or connect it and read below:
Connected: If the 7-pin AUX is connected to the positive terminal of your battery, then it is suggested that to protect the trailer and the vehicle, that a DC-DC charger is installed.
DC to DC charging options
How to change the batteries:
CAUTION: The size of the battery compartment in the 2.0 trailers is for a GROUP 31 battery size. If another size is purchased, they will not fit the OEM location and fittings.
Step 1. Disconnect all breakers.
Step 2. Remove screws from hold down bracket. The screws from the back are tricky to access from the battery side. You might have to access from the fridge side of the tongue box.
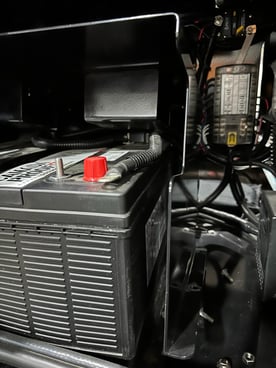
Step 3. Disconnect the all the battery terminals
Step 4. Remove batteries
Step 5. Place new batteries in the battery tray
Step 6. Connect the data cable and resistor plugs (instructions here)
Step 7. Connect the negative and positive battery cables to the appropriate battery terminals.
WARNING: Ensure that the 12v batteries are connected in Parallel. If you are unsure of what this means or how to do it, please contact a professional for installation. Incorrect connections can lead to damage or safety hazards.
Step 8. Reinstall the battery hold down bracket and tighten screws.
Step 9. Ensure the charger you have is set for Lithium Batteries.
Step 10. Configure your batteries: GoPower batteries need to be connected to the GoPower app and configured as seen in this video:
Step 11. Engage breaker and test power.